Thinking about a budget-friendly roofing option? Roll roofing could be just what you need. It’s affordable and simple to put on. This guide will help you learn how to install it, whether you’re new or have some experience.
Ready to start your DIY roll roofing project? Follow these easy steps to make it a success!
Key Takeaways
- Understanding roll roofing is essential for effective installation.
- DIY roll roofing can save you money on labor costs.
- Proper preparation is key to a successful roof repair.
- Choosing the right materials will enhance durability.
- A detailed roofing guide simplifies complex processes.
Understanding Roll Roofing and Its Benefits
Roll roofing is a good choice for many roofing needs. It’s made of asphalt, modified bitumen, or rubber. Knowing what roll roofing is helps us see its benefits for homes and businesses.
What is Roll Roofing?
Roll roofing is a material in big rolls. It’s great for covering big areas fast. It’s easy to put up, which is good for people who like to do things themselves or for contractors.
It can fit many roof shapes and sizes. This makes it useful for lots of different places.
Advantages of Using Roll Roofing
Roll roofing has many benefits. Here are some important ones:
- Affordability: It’s cheaper than most shingles, which is good for your wallet.
- Easy Installation: Putting it up is simple. This saves money and time.
- Minimalist Appearance: It looks sleek and clean. It fits well with many building styles.
- Weather Resistance: It’s strong against weather, so it lasts a long time.
- Lightweight: It’s lighter than many other materials. This makes it easier to handle and put up.
Roll roofing is a smart and affordable choice. It’s good for many roofing needs because it’s practical and easy to use.
Tools and Materials Needed for Installation
Starting a roll roofing project needs the right tools and materials. Good roofing tools make your work better and last longer. Here’s what you should have.
Essential Tools for Installing Roll Roofing
- Utility Knife: Essential for cutting roll roofing materials to the desired size.
- Measuring Tape: Ensures accurate measurements of the roofing area.
- Roofing Nailer: Speeds up the fastening process for the roofing materials.
- Safety Gear: Includes goggles, gloves, and hard hats to protect yourself during installation.
Required Materials for the Project
Choosing the right roll roofing materials is key for a good job. High-quality materials make your roof last longer. Get these important items:
- Roll Roofing Sheets: The main material for the roof.
- Adhesive: Important for securing the roofing sheets.
- Flashing: Prevents water from getting into the roof’s weak spots.
- Roofing Cement: Seals seams and adds extra waterproofing.
With these DIY roofing tools and materials, you’re ready for a great roofing project.
Preparing Your Roof for Roll Roofing Installation
Before starting the roll roofing installation, you must prepare your roof. This means doing a detailed roof check and cleaning the roof well. Fixing any problems early helps the installation go smoothly and lasts longer.
Inspecting the Roof Condition
Start by looking for damage or weak spots on your roof. Check for missing shingles, leaks, or rot. Fixing issues like broken flashing or bad sheathing is key. These problems can harm the new roofing.
Clearing the Roof Surface
Then, clean the roof surface well. Get rid of leaves, branches, and old roofing that won’t stick. A clean roof helps the new roofing stick better and lasts longer. Use a pressure washer or a stiff broom to clean it.
How to install roll roofing?
Installing roll roofing is a smart way to cover your structure. It’s durable and cost-effective. Whether you’re doing it yourself or hiring a contractor, knowing the steps is key.
First, get all the needed materials. This includes the roll roofing, adhesive, and basic tools. Learn the steps to install roll roofing for your roof’s needs. Each step is important for a strong finish.
Break the job into smaller parts. Start with measuring your roof space and cutting the roofing material. Being organized helps you do a great job. Pay close attention to every detail to make your roofing last longer.
Step-by-Step Installation Process
Installing roll roofing needs careful planning. First, measure your roof and cut the material. This ensures you get the right size and make clean cuts.
Measuring the Roof Area
Start by measuring your roof accurately. Here’s how:
- Use a tape measure to find the length and width of each roof section.
- For sloped roofs, measure the rise and run. Then, use the Pythagorean theorem to find the area.
- Write down each measurement. This helps you figure out how much roll roofing you need.
Measuring well helps you cut the roll roofing right. This way, you won’t waste any material.
Cutting the Roll Roofing Material
After measuring, cutting the roll roofing is easy. Here’s what to do:
- Use a sharp knife or roofing cutter for clean cuts that don’t fray.
- Measure twice before cutting. This helps avoid mistakes and ensures each piece is the right length.
- Mark your cuts with chalk. This is helpful when it’s dark.
By measuring and cutting right, you set up your roof for success. Follow these steps to avoid problems later.
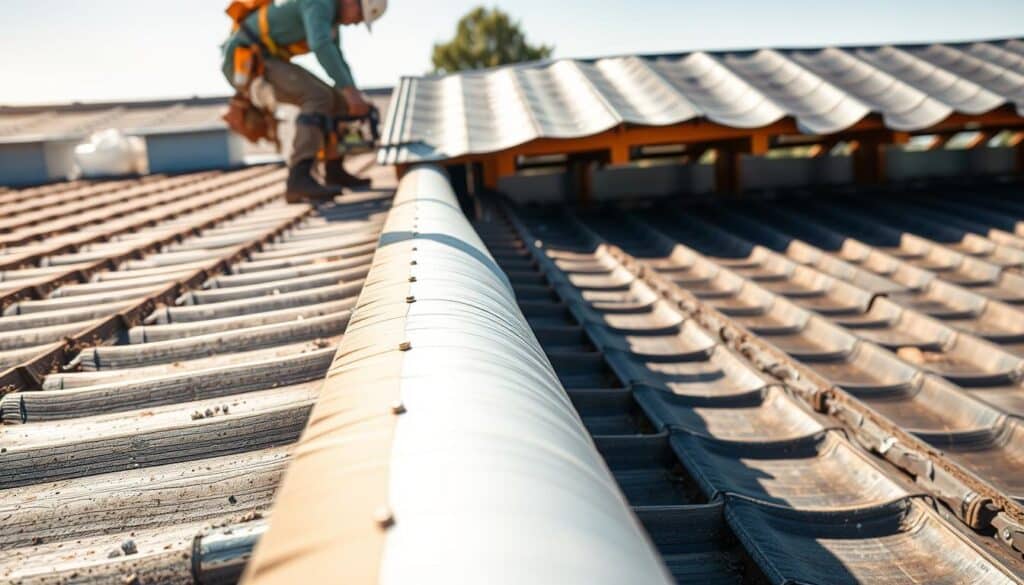
Securing the Roll Roofing
Securing roll roofing needs two key steps: applying adhesive and making sure the rolls overlap right. Doing these well makes your roof strong and leak-free. It’s important to do it right to keep your roof on and protect your home.
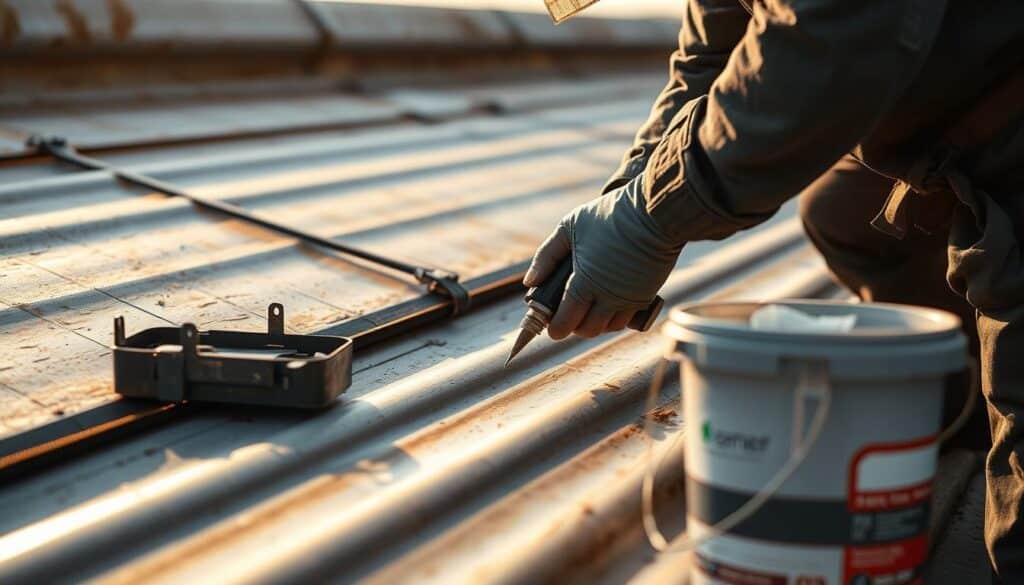
Applying Adhesive and Fasteners
Start by making sure the roof is clean and dry. Use a good adhesive for roll roofing. Spread it out with a notched trowel or roller for a strong bond.
Fasteners are also key. You might use nails or screws, depending on the roof. Put them where the maker says, usually 12 to 18 inches apart on edges and 24 to 36 inches in the middle. Don’t drive them too hard, as it can harm the roof.
Ensuring Proper Overlap of the Rolls
Overlap is crucial to stop leaks. Make sure each roll overlaps the next by 4 to 6 inches, as the maker suggests. This helps keep water out.
To make the overlap even better, put adhesive on the overlapping part and press hard. This, along with fasteners, makes a strong seal. These steps will make your roof last longer and work better.
Dealing with Roof Valleys and Edges
Installing roll roofing is tricky, but roof valleys and edges are the toughest parts. You need to pay extra attention to these spots. This ensures your roof stays tight and lasts longer.
Start by cutting the roofing to fit the valleys. You must measure and cut carefully to avoid leaks. Make sure the edges fit right, as the maker says.
Use glue and nails to hold it in place. Make sure it’s tight. In valleys, overlap the roofing to keep water moving. You can also use flashing to seal seams.
| Technique | Description |
|---|---|
| Precise Cutting | Measure and cut the roll roofing material accurately to fit around the valleys. |
| Proper Overlap | Ensure an adequate overlap at the edges to prevent leaks. |
| Securing with Adhesive | Apply roofing adhesive along the edges for a watertight seal. |
| Installing Flashing | Use flashing on joints for additional protection against water entry. |
By taking good care of roof valleys and edges, you protect your home. Follow these steps well, and your roof will stay in great shape for a long time.
Common Mistakes to Avoid During Installation
Putting on roll roofing can be easy but goes wrong if you’re not careful. Not following the right steps can cause problems. Here are key things to watch out for to avoid common mistakes.
Poor Surface Preparation
One big mistake is not cleaning the roof well before starting. Make sure your roof is clean and free of dirt. If it’s not clean, the adhesive won’t work right, leading to leaks.
Also, check if the roof is strong and if there’s any damage. Fix any problems before you start.
Incorrect Product Application
Another mistake is using the roofing material wrong. Always follow the maker’s instructions, including how to measure and line up. If you don’t do this, water can get in and your roof won’t last as long.
Use these tips to make sure everything is right and sealed well. This will make your roof last longer.
Maintaining Your Roll Roof
Keeping your roll roof in good shape is key. Regular care helps it last longer and work better. By doing roof checks and cleaning, you can spot problems early. This keeps your roof safe and looking good.
Regular Inspections
Check your roof often to see how it’s doing. Try to do this twice a year, in spring and fall. Look for:
- Damaged or loose seams
- Ponding water indicating poor drainage
- Signs of wear or degradation in the material
Write down what you find. This helps you plan for future care and fixes.
Cleaning and Repairs
It’s important to clean your roof to stop dirt and mold. Use a soft brush and water with a bit of soap. Don’t use strong water sprayers, as they can harm the roof. For small fixes, like small tears, use a patch kit right away. This stops bigger problems later.
Weather Considerations for Roof Installation
When you plan to put a new roof on, think about the weather. Weather can really change how well your roof lasts. The best time to put on a roof is when it’s dry and not too hot or cold. This is usually in late spring or early fall.
Rain or very cold weather can make it hard to install a roof. Rain can slow things down and mess with how materials stick together. High humidity can also make adhesives take longer to dry. And very cold weather can make materials too hard to stick well.
- Always check the local weather forecast before starting.
- Use materials that can handle different weather.
- Make sure the area is dry and clear before you start.
These steps can help your roof project succeed and keep your investment safe. Knowing how weather affects roofs is key to keeping your roof in good shape.
Environmental Impact and Sustainability
Choosing the right materials for roll roofing matters a lot. It affects the planet. Eco-friendly options help make our planet greener. Today, many sustainable materials are available.
These materials cut down on waste and save energy. They are good for the planet and your home.
Choosing Eco-Friendly Roll Roofing Options
There are many eco-friendly products for roofing. They have special benefits. For example, recycled materials reduce landfill waste.
Choosing materials like rubberized asphalt or thermoplastic membranes saves energy. Your home will use less power.
Going green with roofing doesn’t just help the planet. It also makes your roof last longer. These materials stand up well to weather.
By picking sustainable options, you lower your impact on the environment. And you get a strong roof for many years.
Cost Analysis of Installing Roll Roofing
Planning a roll roofing project means knowing the costs. A good budget helps manage your money, whether DIY or hiring a pro. Knowing the costs helps you plan better.
Budgeting for Materials and Tools
For a DIY budget, remember all materials and tools. Roll roofing costs $0.50 to $2.50 per square foot. You’ll also need adhesives, nails, and flashing. Here’s a rough guide:
| Item | Estimated Cost |
|---|---|
| Roll Roofing Material (per square foot) | $0.50 – $2.50 |
| Adhesives and Sealants | $40 – $100 |
| Nails and Fasteners | $30 – $60 |
| Tools (if not owned) | $100 – $300 |
| Total Estimated DIY Costs | $300 – $800 |
Possible Labor Costs if Hiring Professionals
Thinking about hiring pros? Know the labor costs. They range from $2.00 to $5.00 per square foot. This includes their work, skills, and tools. Here’s what to expect:
| Item | Estimated Cost (per square foot) |
|---|---|
| Labor Costs | $2.00 – $5.00 |
| Additional Fees (repairing old roofs, etc.) | $50 – $500 (flat rate) |
| Total Estimated Professional Costs | $1,500 – $3,500 |
Looking at DIY and pro options helps you choose wisely. Remember, unexpected costs can happen. So, add extra money to your budget for surprises.
Alternatives to Roll Roofing
Looking for roofing materials for your home? There are many options beyond roll roofing. Each has its own benefits, like cost, durability, and more. This helps you choose the right one for your needs.
Other Roofing Materials to Consider
Homeowners often pick from several roofing materials. Here are three popular ones, with their good and bad points:
| Type of Roofing | Cost (per sq. ft.) | Durability | Application |
|---|---|---|---|
| Asphalt Shingles | $90 – $100 | 15-30 years | Easy to install, suitable for most roofs |
| Metal Roofing | $100 – $300 | 40-70 years | Requires professional installation, lightweight |
| Clay Tiles | $300 – $800 | 50+ years | Heavy, may need reinforced roof structure |
These options offer different looks and functions. Asphalt shingles are cheap and easy to put on. Metal roofing is durable and saves energy. Clay tiles last long and look classic. Knowing these can help you pick the best for your home.
Conclusion
We’ve looked at the good things about roll roofing and how to put it in. This guide helps you do a great job on your roof. It keeps your home safe from leaks and damage.
By following our steps, you can get your roof ready, installed, and kept up well. This makes you feel sure and confident.
This summary also talked about what tools and materials you need. It gave tips to avoid mistakes. Remember, keeping your roof in good shape is key.
Do regular checks to make sure your roof stays strong. With the right steps, your roll roofing will last a long time. You’ll enjoy it for many years.
FAQ
What is roll roofing made of?
Roll roofing is made from asphalt, modified bitumen, or rubber. It’s strong and lasts long on low-slope roofs.
How long does roll roofing last?
Roll roofing can last 10 to 20 years. This depends on the materials and how well it’s maintained.
Can I install roll roofing myself?
Yes, you can install roll roofing yourself. Just make sure you have the right tools and know how to do it.
What tools will I need for roll roofing installation?
You’ll need a utility knife, measuring tape, and a roofing nailer. Don’t forget safety gear like gloves and goggles.
How can I prepare my roof for roll roofing?
First, check your roof for damage. Fix any leaks or rot. Then, clean the roof to help the roofing stick well.
What is the cost of installing roll roofing?
The cost depends on the materials and if you do it yourself or hire someone. Materials cost between $1.50 and $4.00 per square foot.
How can I maintain my roll roof?
Keep an eye on your roof and clean it regularly. Fix small problems fast to make your roof last longer.
What are common mistakes to avoid when installing roll roofing?
Don’t skip surface prep, measure wrong, or not secure overlaps well. These mistakes can cause leaks and problems.
How does weather affect the installation of roll roofing?
Weather matters a lot. Install in mild, dry weather for best results. This helps the roofing stick well and avoids problems.
Are there eco-friendly options for roll roofing?
Yes, there are eco-friendly roll roofing options. They’re made from sustainable materials. They’re good for the planet and work well.