Welcome to our metal roof installation guide. We’ll show you how to install standing seam metal roofing. These roofs are known for being strong, saving energy, and looking modern. In this guide, you’ll learn the key steps and materials needed for a great job. You’ll get tips and techniques to make your project easy and fun!
Key Takeaways
- Standing seam metal roofing offers durability and energy efficiency.
- Proper preparation is crucial for installation success.
- Choosing the right materials can enhance your roof’s longevity.
- Understanding installation techniques will reduce common mistakes.
- Follow each step for a seamless roofing experience.
Introduction to Standing Seam Metal Roofing
Standing seam metal roofing is loved by many for homes and businesses. It has panels that fit together tightly, giving a sleek look. These panels run from the top to the bottom, making it look modern.
It has raised seams that keep water out, making it great against leaks. This is why it’s so good at keeping your roof dry.
The design of standing seam roofing also lets it move with the weather. This helps your roof stay strong over the years. Knowing its benefits can help you choose the right roof for your project.
Benefits of Standing Seam Metal Roofing
Standing seam metal roofing has many good points. It lasts a long time with the right care. You can expect it to last over 50 years.
This means you won’t need to replace or fix it as often. It’s a smart choice for saving money in the long run.
Metal roofs also keep your home cool in summer. They reflect the sun’s heat, which saves on cooling costs. This makes them a great pick for saving on energy bills.
Standing seam roofs are also safe from wind, hail, and fire. They make your home safer and more secure. This adds to their appeal for many homeowners.
In short, standing seam roofing is long-lasting, saves energy, and is safe. Thinking about these points can help you choose the right roofing for your home.
Understanding the Components of Standing Seam Metal Roofing
The parts of standing seam roofing are key to your roof’s look and function. Knowing these metal roofing parts helps when planning your roof.
The main part is the metal panels. They can be made from galvanized steel, aluminum, or zinc. Each has its own benefits for different climates and looks.
Fasteners are crucial too. They hold the panels to the roof, making it strong and lasting. Good fasteners don’t rust and stay tight in all weather.
Clips are important for the panels to move a bit when it gets hot or cold. This keeps the roof safe from damage over time.
Trim pieces make the roof look nice. Things like ridge caps and eave flashing add a finished look. They also keep water out, making the roof better.
| Component | Material | Purpose |
|---|---|---|
| Metal Panels | Galvanized Steel, Aluminum, Zinc | Main roofing surface |
| Fasteners | Stainless Steel | Secure panels to the roof |
| Clips | Metal | Allow thermal movement |
| Trim Pieces | Variable (Metal, Sealants) | Finish edges and improve weather resistance |
Tools Needed for Installation
Having the right tools is key for installing standing seam metal roofing. Make sure you have all the tools you need before you start. Important tools include:
- Metal snips for making precise cuts on panels.
- A cordless drill for creating pilot holes and securing fastening systems.
- A reliable tape measure for accurate measurements.
- A chalk line for layout and marking your installation lines.
Don’t forget safety gear. Wear gloves, goggles, and a hard hat to stay safe.
Using the right tools makes the job easier and safer. It helps you work better and faster.
| Tool | Purpose |
|---|---|
| Metal Snips | Cut metal panels |
| Cordless Drill | Drill pilot holes and fasten panels |
| Tape Measure | Ensure accurate measurements |
| Chalk Line | Create straight layout lines |
| Safety Gear | Protect yourself during installation |
Preparing Your Roof for Installation
Before you start, make sure your roof is ready for the new metal roofing. Check the roof for damage or repairs needed. A strong roof is key for a good installation.
Then, clean the roof surface. Get rid of debris, old shingles, and anything in the way. A clean roof makes the job safer and easier.
Don’t forget to add the right underlayment. It keeps your home dry and helps with air flow. This layer makes your new roof last longer and work better.
How to install standing seam metal roofing?
Installing a standing seam metal roof makes your home stronger and look better. It’s important to follow the right steps to make sure your roof lasts long. This guide will help you install your roof easily, covering key steps and common mistakes to dodge.
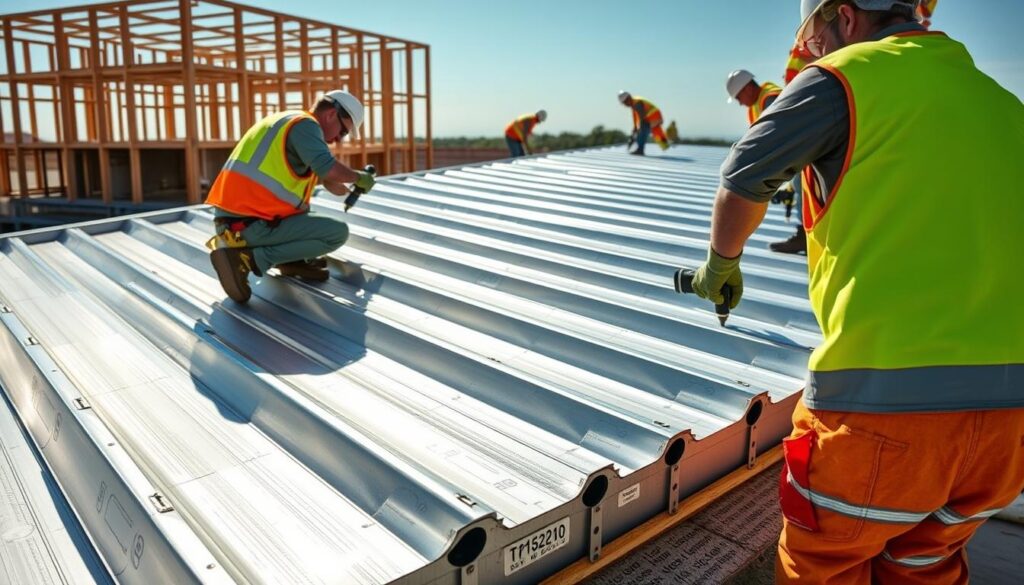
Step-by-Step Installation Process
First, measure and mark your roof layout carefully. This will guide you during the installation. Cut the metal panels to the right size.
Once your panels are ready, attach the first one to the roof. Make sure it fits perfectly with your marks. Then, put the next panels on top, overlapping them. Use the right fasteners to keep them tight and sealed.
After finishing, add flashing and trims. They protect the seams and make your roof look great.
Common Mistakes to Avoid
Some mistakes can make your roof not work right. One big one is not aligning panels correctly, which can cause leaks. Also, using the wrong fasteners can make your roof unstable.
Not paying attention to ventilation can lead to moisture and a shorter roof life. Knowing these mistakes helps you install your roof right.
Choosing the Right Metal for Your Roof
Choosing the right metal for your roof is very important. It affects how long your roof lasts and how it looks. There are many types of metal roofing, each with its own special features.
Galvanized steel is very strong and doesn’t rust easily. This makes it great for places with harsh weather. Aluminum is light and also doesn’t rust, perfect for coastal areas. Copper looks amazing but costs more.
Think about your local weather, budget, and what you want your roof to look like. If it rains a lot, you might need stronger materials. But if it’s dry, you can choose lighter ones.
It’s also smart to find local suppliers. This way, you can make sure the metal you choose fits your needs and standards.
| Type of Metal | Strength | Rust Resistance | Cost |
|---|---|---|---|
| Galvanized Steel | High | Moderate | Medium |
| Aluminum | Moderate | High | Medium to High |
| Copper | Moderate to High | High | High |
Understanding Roof Pitch and Its Importance
Roof pitch is very important in roofing. It’s the angle of your roof. It’s shown as a ratio of vertical rise to horizontal run. This ratio affects your home’s look and how well it works.
The slope of your roof helps water drain away. A good roof pitch keeps water out, preventing leaks and damage. In places with lots of rain or snow, a proper pitch is even more important. Standing seam metal roofs can work on low-slope designs, adding to their appeal.
Knowing about roof pitch helps you choose the right materials and how to install them. Planning well for your roof’s pitch makes it last longer and work better. This means your roofing investment will be worth it in the long run.
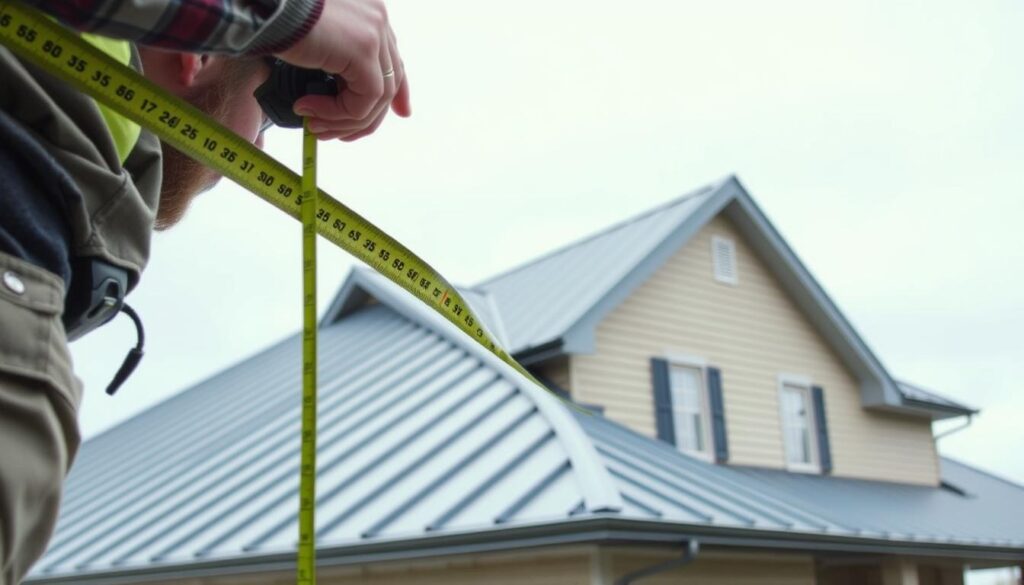
How to Measure Your Roof
Getting your roof measured right is key for a good roofing job. Start your roof measurement guide by measuring each roof part’s length and width. Remember to include any special features or outcroppings. A good measuring tape is crucial for exact measurements.
To figure out your roof’s total square footage, just multiply its length by its width for each part. This helps you know how much material you’ll need. If your roof is shaped differently, break it into simple rectangles. Then, measure each rectangle.
Being thorough with your measurements means better planning and installation. Knowing how to measure a roof right helps you buy the right amount of materials. This saves you from waste, and it saves time and money too.
Installing the Underlayment
The underlayment is key to your roof’s strength. It sits between the roof and the metal panels. It keeps moisture out and keeps the roof warm.
Choosing the right underlayment is important. Look for high-quality options like synthetic or felt. They protect well against the weather.
Start installing the underlayment at the roof’s edge. Move up to the top. Make sure each piece overlaps the last one. This keeps water out. Use nails to hold it in place, following the maker’s guide.
Here’s a table showing underlayment types and their benefits:
| Type of Underlayment | Advantages |
|---|---|
| Synthetic | Lightweight, moisture-resistant, and durable. |
| Felt | Cost-effective, offers insulation, and provides good moisture resistance. |
| Rubberized | Excellent waterproofing and self-sealing capabilities. |
Securing the First Panel
When you start installing roofing panels, it’s key to get the first one right. Begin by lining up the panel with the marks you made earlier. Make sure the panel’s edge hits the eave, setting the right start.
Use top-notch fasteners to hold the metal roof in place. Follow the maker’s advice on what fasteners to use and how far apart. This helps your roof last longer and stay strong. As you work, make sure the panel is even and straight. This is important because it sets the base for the rest of the panels.
- Double-check all measurements before making any installations.
- Keep the first panel flush against the eave to avoid water intrusion.
- Verify that the fasteners do not penetrate too deeply to maintain the integrity of the panel.
| Step | Description |
|---|---|
| 1 | Align the panel with marked layout. |
| 2 | Secure the panel using recommended fasteners. |
| 3 | Ensure the panel is level and straight. |
| 4 | Check for proper edge alignment at the eave. |
By following these steps, you set up your roofing project for success. Getting the first panel right is crucial. It affects how your roof looks and works.
How to Overlap and Secure Panels Properly
Installing standing seam metal roofing needs careful overlap to avoid leaks. Aim for 1 to 2 inches of overlap. This ensures a tight water-resistant barrier.
Proper installation is more than just overlap. It also means securing each panel right. Choose the right fasteners for your metal type.
Watch the panels as you install them. Correct alignment is key for looks and strength. The overlap helps the roof handle tough weather. Make sure to secure panels well for their long life.

Installing Flashing and Trim
After putting on your metal panels, it’s time to add flashing and trim. This step keeps your roof dry and looking good. Flashing is key to keeping water out, directing it away from where it could get in.
Pay close attention to spots around chimneys, vents, and roof edges. These areas are more likely to leak. Using pre-made flashing helps make your roof look neat and makes installation easier.
Make sure each piece of flashing is sealed well. Good sealing stops water from getting in and makes your roof last longer. The final touches are important for your roof’s long-term health.
| Component | Purpose | Installation Tips |
|---|---|---|
| Flashing | Guides water away from seams and penetrations | Use pre-manufactured pieces wherever possible |
| Trim | Covers exposed edges for a polished look | Ensure secure attachment and proper sealing |
| Sealant | Enhances waterproofing | Apply liberally on all seams and intersections |
Adding metal roofing trim and flashing makes your roof work better and look better. Focus on this step for the best results. Your roof will look great and stay safe from the weather.
Finishing Touches on Your Metal Roof
The last steps in roofing are key. They make sure your metal roof works well and looks good. First, check all seams, panels, and flashing carefully. Make sure everything is tight and there are no missing fasteners.
Next, clean the roof of any debris from the installation. A clean roof looks better and helps with maintenance later.
Adding ridge caps can make your roof look even better. These caps add character. But, make sure they meet local building codes for safety and legality.
Getting your roof ready for inspection is important. These final steps help your roof last longer and look great. It means your roofing job is done well.
Conclusion
Finishing your roofing project with standing seam metal roofing is a big step. It’s more than just a task; it’s an investment in your home’s future. This guide has given you all the steps and tips you need for a successful installation.
By using top-quality materials and following the steps carefully, you’ll get many benefits. Your roof will last longer and save energy.
When you look at your new roof, think about all the hard work you put into it. This project not only makes your home look better but also increases its value. It shows how important careful planning and skill are for a lasting roof.
With this guide, you’re ready for any challenges. You’ll feel proud knowing you’ve made your home safer and more stylish. Your roof will protect you for many years.
FAQ
What are the key benefits of standing seam metal roofing?
Standing seam metal roofing is very durable and saves energy. It also needs little upkeep. It can last over 50 years and keeps your home cool in summer.
How does weather impact standing seam metal roofing?
This roofing can handle strong winds, hail, and extreme temperatures. Its design lets it expand and contract with the weather. This helps prevent leaks or damage.
What tools will I need for installation?
You’ll need metal snips, a cordless drill, a tape measure, and a chalk line. Also, safety gear like gloves, goggles, and a hard hat is important for safety.
How do I prepare my roof for installation?
First, check if your roof is strong enough. Clean it and apply the right underlayment to keep it dry. Good ventilation is also key for your roof to work well.
How can I ensure accuracy while measuring my roof?
Measure each part of your roof carefully. Use a good measuring tape. Then, multiply the length and width to find the square footage. This helps you buy the right amount of materials.
Why is roof pitch important for standing seam metal roofing?
Roof pitch helps water run off and prevents leaks. Standing seam roofs work on low-slope roofs too. Knowing your roof’s pitch is important for correct installation.
What type of metal should I choose for my standing seam roof?
You can choose from galvanized steel, aluminum, or copper. Think about your climate, budget, and how it looks. Find a local supplier that meets your needs.
What common mistakes should I avoid during installation?
Avoid wrong panel alignment, bad fasteners, and ignoring ventilation. Paying attention to these details helps your roof last longer without problems.
How do I install the flashing and trim on my metal roof?
After putting on the panels, add flashing and trim. This seals all joints and covers edges. It makes your roof more waterproof and durable against weather.