Want to shingle a hip roof with four dormers? You’re in the right spot! This guide will show you how to do it right. You’ll learn about the special steps for dormers and what you need to get started.
You’ll also find out how to stay safe and the steps to a watertight roof. Ready to learn how to shingle a roof like a pro?
Key Takeaways
- Understand the unique features of hip roofs and dormers for a better shingling approach.
- Gather the right materials and tools to ensure a smooth roofing project.
- Prioritize safety with proper gear and fall protection measures.
- Follow a step-by-step process to achieve an aesthetically pleasing and functional roof.
- Learn how to maintain your new roofs effectively for longevity.
Understanding Hip Roofs and Their Benefits
A hip roof is a favorite among homeowners. It has slopes on all sides that meet at a ridge. This makes it strong and looks good.
What is a Hip Roof?
A hip roof has sloped sides. It’s different from gable roofs, which have triangular ends. Hip roofs are fully enclosed, making them better at handling wind.
Advantages of Hip Roofs
Hip roofs have many good points. Here are some:
- Structural Stability: Hip roofs are more stable than gable roofs. They’re great for places with bad weather.
- Enhanced Drainage: These roofs help water run off. This is key in rainy areas.
- Increased Attic Space: Hip roofs often have more attic space. You can turn this into extra living areas.
- Versatile Design: Hip roofs fit well with many home styles. They make your home look better.
When picking a roof, think about hip roofs. They’re good for many reasons, like the weather and upkeep. The right roof keeps your home stylish and safe.
Materials Needed for Shingling a Hip Roof
Choosing the right roofing materials is key for a hip roof. You’ll find many shingles for different climates and looks. Also, having the right tools makes your project easier and faster.
Types of Shingles to Use
The shingles you pick affect your roof’s look and life. Here are some common ones:
- Asphalt shingles – They’re affordable and versatile.
- Wood shingles – They look rustic but need more care.
- Metal shingles – They’re durable and save energy.
- Tile shingles – They look elegant but are heavier and cost more.
Tools You’ll Need for the Job
Having the right tools is important for a good roof job. Make sure you have these:
- Roofing nailer or hammer
- Utility knife for cutting shingles
- Chalk line for marking rows
- Ladder for safe roof access
Remember to also get underlayment, flashing, and sealant. They make your roof weatherproof.
Safety Precautions Before You Start
Starting a roofing project means you need to think about safety first. Knowing how to stay safe and having the right gear is key. This helps keep you safe while you work on the roof.
Essential Safety Gear
Before you go up on the roof, make sure you have these important safety items:
- Hard hat to keep your head safe from falling things.
- Safety goggles to protect your eyes from dust and flying stuff.
- Gloves to help you grip better and keep your hands safe from sharp things.
- Slip-resistant shoes to keep your feet steady on the roof.
Fall Protection Measures
It’s very important to have ways to prevent falls when you’re up high. You can use:
- Safety harnesses that connect to strong points on the roof.
- Guardrails around the roof’s edge to stop falls.
- Scaffolding to make a safe place to work from.
Preparing Your Roof for Shingling
Before you start shingling, you must prepare your roof well. Start with a thorough roof inspection. This helps find any problems like rotting wood or water damage.
Fixing these issues early can prevent bigger problems later.
Inspecting the Roof Structure
Look closely at the rafters, decking, and trusses during the inspection. Check for mold, decay, or sagging. Note any big damage that needs fixing before new shingles go on.
Removing Old Shingles and Debris
Then, remove the old shingles and clean up debris. Use a pry bar to take off the old shingles safely. Make sure to get rid of all debris for a clean surface.
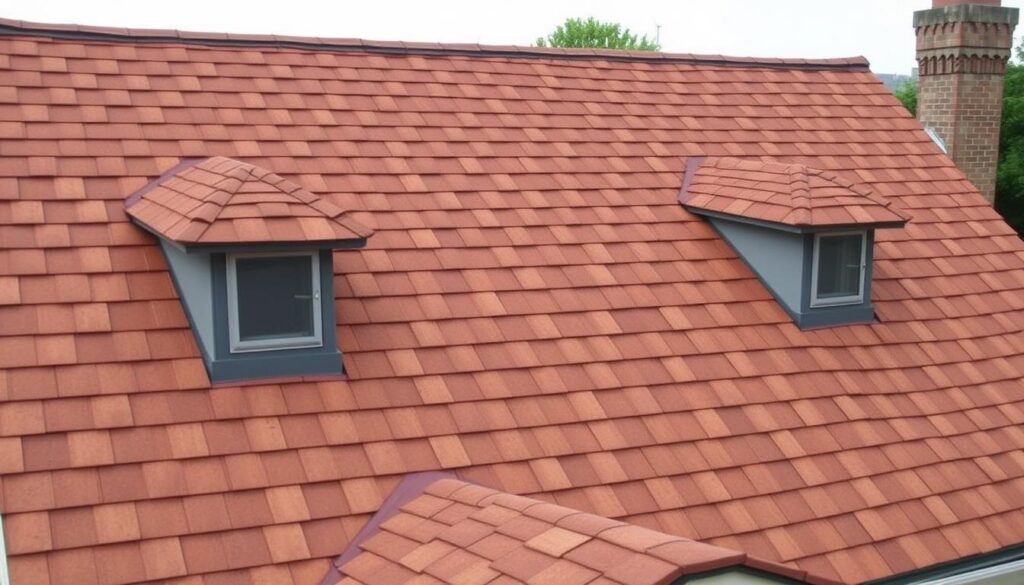
How to Shingle a Hip Roof with 4 Dormers?
Shingling a hip roof with four dormers needs careful planning. Start by checking your workspace. Make sure all tools and materials are within reach. This step helps break down the project into parts for a smooth flow.
Begin with the main roof panels. Then, move on to the dormers. Keep the shingles aligned and spaced evenly. Pay extra attention to dormers to fit the shingles right.
After shingling the main panels, focus on the dormers. Each dormer has its own steps. Start from the bottom and work up, making sure water flows away. Installing flashing around dormers helps prevent leaks and makes your roof last longer.
In short, the secret to shingling a hip roof with four dormers is in the details. A structured approach ensures a look that matches your home’s unique design.
Laying the First Course of Shingles
Starting your roofing project with the first course is key. It lays the groundwork for your roof’s look and function. You need to be precise to get it right.
Proper shingle alignment and spacing are crucial. They make your roof weather-resistant and look good.
Starting at the Bottom Edge
Start laying shingles at the roof’s bottom edge. Make sure they are even across. A chalk line helps keep things straight.
This method ensures your shingles are laid out right. It makes your roof look great and boosts curb appeal.
Spacing and Alignment Tips
Keep spacing between shingles consistent during the first course. Use the manufacturer’s guidelines for overlap and spacing. This is important for a good look.
Check your work often to avoid mistakes. This ensures your roof is waterproof and reliable.
Shingling Around Dormers
Shingling dormers needs careful planning. This ensures they fit well with your roof. Each dormer must be aligned and waterproofed right.
Flashing is key to stop leaks. It keeps water away from weak spots.
Planning for Each Dormer
Start by looking at your dormers’ layout. Mark their start and end points. This helps place shingles correctly.
Custom cut shingles fit dormers well. Make sure shingles overlap to keep water out.
Flashing and Sealant Techniques
Flashing is vital for dormer roofs. Use metal flashing around dormers to block moisture. Apply sealants where shingles meet dormer walls.
Choose a good sealant for your shingles. Right flashing and sealant keep your roof safe and last longer.
Finishing Up with Ridge Cap Shingles
After laying down your shingles, it’s time for the final touch: ridge cap shingles. These shingles are key for a good roof finish. They keep water out and make your roof look nice.
Putting them on right keeps your roof safe from the weather.
Importance of Ridge Caps
Ridge caps do a lot for your roof. They protect the roof’s ridge, which is often weak. They stop water and wind damage.
They also make your home look better. A roof with ridge caps looks complete and adds value.
How to Properly Install Ridge Caps
Installing ridge caps is important for a strong roof. Start by covering the last row of shingles. Make sure they fit well.
Use a roofing nail in the middle of each shingle. Check the alignment often for a neat look. This will keep your roof looking good and safe for years.
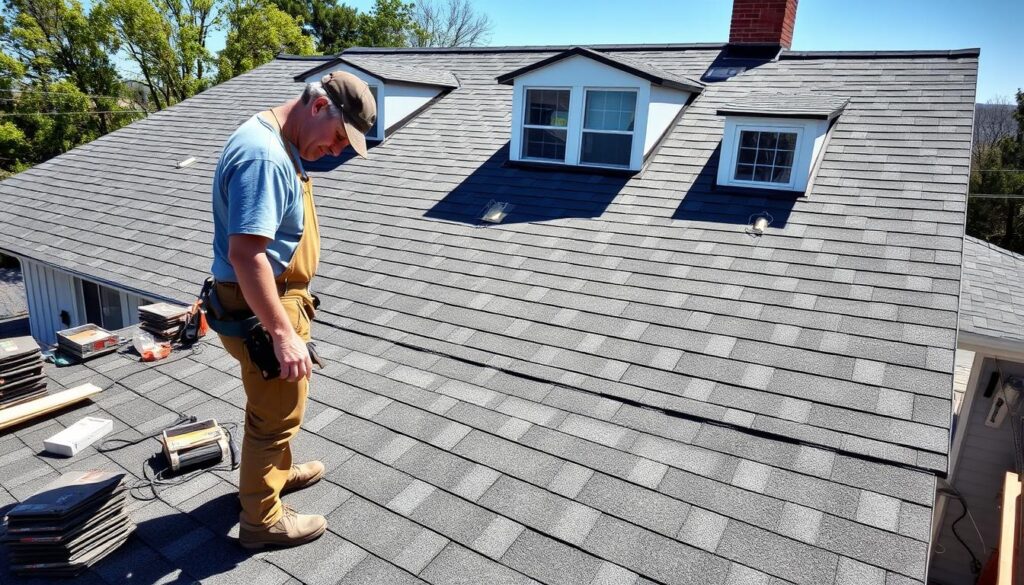
Inspecting Your Work After Shingling
After shingling, it’s important to check your work. A good inspection helps find any problems. This way, you can fix them before they get worse.
Checking for Gaps and Imperfections
Look closely at the shingles for gaps or mistakes. Gaps can let water in, which is bad. Also, check if the shingles are flat and in place.
Any problems should be fixed right away. This keeps your roof strong and safe.
Final Cleaning and Debris Removal
After checking, clean up the area. Get rid of all leftover stuff and mess. This makes your roof look good and helps avoid future problems.
Maintaining Your New Roof
To keep your new roof in top shape, you need to pay attention all the time. Check your roof often to find small problems before they get big. Look for loose shingles, debris, or wear, especially after bad weather.
Routine Inspections
Make sure to check your roof at least twice a year. Look closely at the flashing, gutters, and shingles. Finding problems early can save you money and make your roof last longer.
Cleaning and Care Tips
Cleaning your roof regularly helps it look good and work well. Clean out gutters to stop clogs. Use the right cleaning to get rid of mold or algae on shingles. This keeps your roof looking great and working right.
Common Mistakes to Avoid When Shingling
Shingling a roof needs careful attention. Some mistakes can harm your roof’s health. Shingle overlap errors and bad flashing installation are common problems. Knowing these can help make your roof last longer.
Overlapping Shingles Incorrectly
Not overlapping shingles right is a big mistake. It’s key to keep water off your roof. If shingles don’t overlap right, water can leak in and damage your home.
Make sure each row of shingles covers the seams of the row below. This stops leaks and saves your home from damage.
Neglecting Flashing Installation
Ignoring flashing around dormers and roof valleys is another mistake. Flashing problems come from not paying attention during installation. Without good flashing, water can get in and harm your roof’s structure.
Good flashing keeps water out, making your roof last longer. So, don’t forget to install it right.
Watch out for these mistakes when shingling your roof. Paying attention and being careful will make your project better.
When to Call a Professional
Knowing when to ask for help can save you time and money. Some situations mean you need to hire roofing experts. If you see big damage, complex designs, or feel scared of heights, it’s best to get help.
Seeing these signs means you should hire a contractor. This can make your roofing project go smoothly and fast.
Signs You Might Need Help
- You notice significant leaks or water stains inside your home.
- The roof appears sagging or has unusual dips.
- Extensive damaged shingles cover a large area.
- You lack experience working with roofing materials or heights.
Choosing the Right Contractor
Be careful when picking a contractor. Look for ones with good credentials and positive feedback. Choose experts in hip roofs and dormers for the best results.
Don’t be shy to ask for references and look at their past work. This helps you know if they’re good at what they do.

Conclusion
Finishing your roofing project needs careful planning and doing things right. When you’re working on a hip roof with four dormers, you must pay close attention. Following this guide will help you get a roof that looks great and keeps you safe from the weather.
Knowing what materials to use and how to use them is key. This guide shows you how to make your roof strong and good-looking. It’s important to check and take care of your roof after it’s installed. This keeps it working well for a long time.
With hard work and the right steps, you’ll have a beautiful hip roof. Think about these last points. A well-done project makes your home look better and keeps it safe for many years.
FAQ
What is a hip roof?
A hip roof has slopes on all sides. They meet at the top to form a ridge. This design is strong and good against bad weather.
What materials do I need for shingling a hip roof?
You’ll need shingles like asphalt, wood, metal, or tile. Also, get underlayment, flashing, and sealant. Don’t forget tools like a roofing nailer and ladder.
How do I ensure safety while shingling my roof?
Wear a hard hat, safety goggles, gloves, and slip-resistant shoes. Use fall protection like harnesses and guardrails at heights.
What should I do before applying new shingles?
Check the roof for damage or rot before starting. Remove old shingles and debris for a clean start.
How do I shingle around dormers?
Plan dormer shingling with the roof’s system in mind. Use proper flashing and sealants to avoid leaks.
What are ridge cap shingles and why are they important?
Ridge cap shingles cover the roof’s peak. They help prevent leaks and give a clean look to the roof.
How can I inspect my work after shingling?
Check for gaps or imperfections in shingles. Clean up debris to ensure a safe and neat finish.
How can I maintain my new roof?
Regularly inspect for loose shingles or debris. Clean gutters and remove mold or algae to keep your roof in good shape.
What common mistakes should I avoid when shingling?
Avoid wrong overlaps to prevent leaks. Make sure flashing is right around dormers and valleys to stop water damage.
When should I consider hiring a professional for my roofing project?
Hire a pro for big damage, complex designs, or if you’re scared of heights. Choose someone with experience in hip roofs and dormers.