Moss on a roof may seem harmless at first glance, but underneath that green carpet lies potential damage to your home. Left unchecked, moss can shorten the lifespan of your roof, increase energy costs, and even cause leaks. But don’t worry—we’re here to guide you through why moss is harmful and how to safely and effectively remove it.
What is Moss, and Why Does it Love Your Roof?
Before we jump into the solutions, let’s understand what we’re dealing with.
What is Moss?
Moss is a small plant that thrives in cool, damp environments. It reproduces by spores and quickly spreads, creating a thick, soft, green layer on surfaces—your roof included.
Why Does Moss Grow on Roofs?
Moss growth is most common in areas that:
- Are shaded (north-facing roofs or roofs under tree canopies)
- Have high humidity
- Experience poor drainage
Basically, anywhere moisture lingers on your roof for long periods becomes the perfect breeding ground for moss.
The Impact of Moss on Your Roof
- Retains Moisture – Moss traps moisture against your roofing materials. Over time, this can lead to cracked or curling shingles and water damage.
- Reduced Longevity – The structural integrity of your shingles may weaken, potentially leading to costly repairs or replacement.
- Lower Energy Efficiency – Moss blocks your roof’s ability to reflect sunlight, causing your home to retain heat and increasing cooling costs during summer.
Step-by-Step Guide to Remove Moss from Your Roof
Removing moss from your roof doesn’t have to be complicated, but it does require preparation and care. Follow these steps to remove moss safely while protecting your roof.
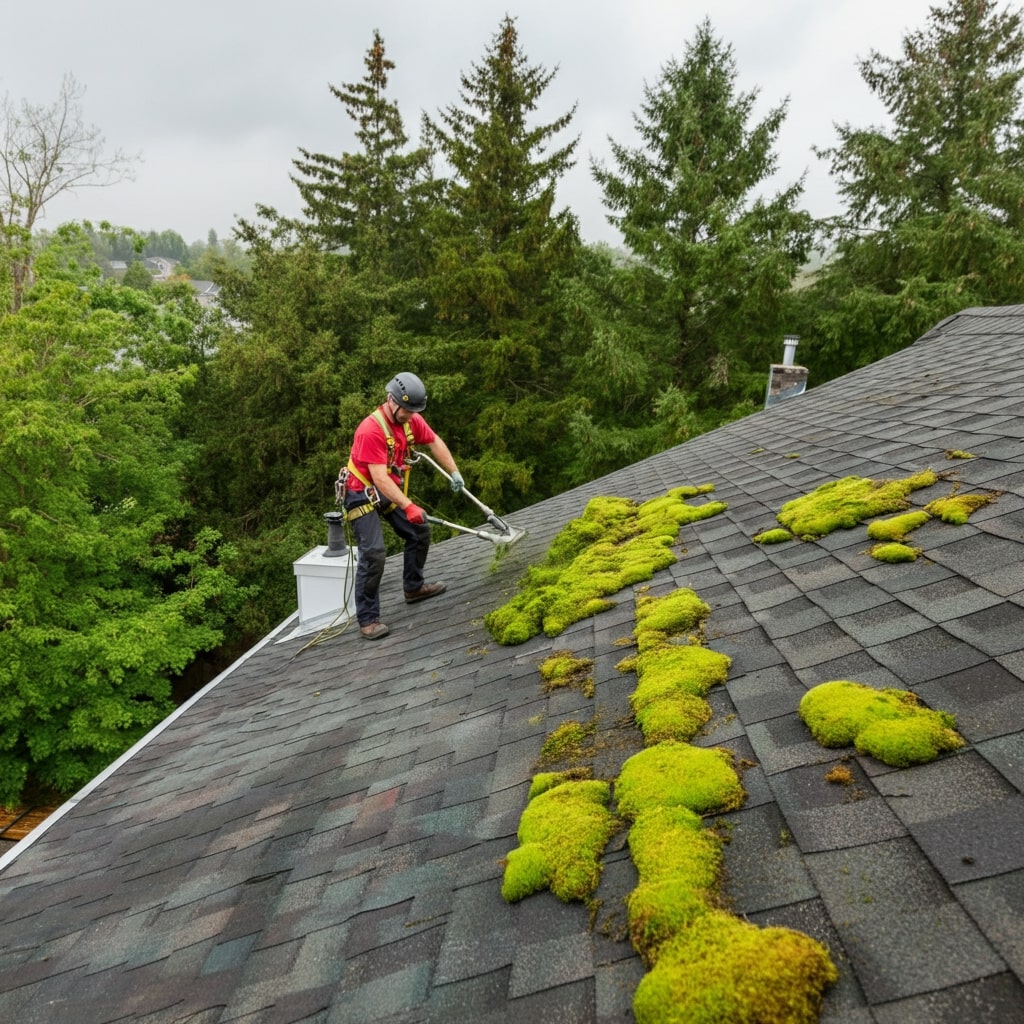
Step 1: Prioritize Safety
Before climbing onto your roof, ensure you have:
- A sturdy ladder
- Non-slip shoes
- Gloves
- Eye protection
- A climbing harness if the roof is steep or tall
Bonus tip: Always have a helper on the ground for assistance.
Step 2: Wet the Moss
Use a garden hose to gently spray the moss-covered areas with water. This helps loosen the moss and keeps spores from becoming airborne as you work.
Step 3: Apply Moss Killer
Choose a moss killer that is safe specifically for roofs. Spray the solution as directed by the manufacturer. Avoid harsh chemicals that might damage the environment, your lawn, or your shingles.
Step 4: Gently Scrub the Moss
After letting the moss killer soak in, use a soft-bristled brush to carefully scrub the moss off. Work downward to avoid lifting or damaging the shingles. Do not use a pressure washer—high-pressure water can seriously damage your roof.
Step 5: Rinse Thoroughly
Rinse the roof with a garden hose to wash off any remaining moss debris and moss-killing solution.
Alternative Moss Removal Methods
If commercial products don’t appeal to you, consider these natural alternatives:
Vinegar Solution
Mix equal parts water and white vinegar, spray it on the moss, and leave it for a few hours before scrubbing and rinsing.
Oxygen Bleach
Unlike chlorine bleach, oxygen bleach is eco-friendly and safe for roofing materials. Mix with water, apply generously to the moss, and scrub after a few minutes.
Preventing Moss from Coming Back
Once you’ve cleaned your roof, take steps to prevent moss from regrowing.
Improve Drainage
Keep gutters and roof valleys free of debris to ensure proper water drainage. You can also install zinc or copper strips near the roof ridge—rainwater flowing over these strips creates an environment hostile to moss.
Trim Overhanging Branches
Cut back any tree branches that shade your roof. More sunlight on your roof discourages moss from forming.
Perform Routine Inspections
Inspect your roof at least twice a year for any early signs of moss or damage. Address issues promptly to prevent costly repairs.
Safety Considerations When Removing Moss
Your safety is as important as your roof’s health. Here are a few tips to keep in mind:
- Use appropriate safety gear, especially on steep roofs.
- Avoid working on the roof if the surface is wet or slick.
- Opt for eco-friendly moss removers to protect your health and the environment.
How to Keep Your Roof Moss-Free Long Term
- Choose a Cool, Overcast Day – This helps the moss-killing solution work more effectively.
- Divide the Roof into Sections – Tackle one small area at a time to ensure thorough cleaning.
- Don’t Delay – Address moss growth as soon as you spot it to prevent extensive buildup and potential damage.
Extending Your Roof’s Life
By removing moss promptly and taking preventative steps, you’ll not only improve your roof’s appearance but also extend its lifespan. Regular maintenance pays off—saving you money and ensuring your home stays protected from the elements.
Reach Out for Professional Help
If the idea of climbing onto your roof seems daunting or your moss infestation is significant, there’s no shame in calling a professional roofing service. Experts have the tools, experience, and safety equipment to get the job done right.
Here’s to a Moss-Free Roof!
Maintaining your roof is critical to protecting your home and keeping repair costs down. By following the steps outlined here, you’re well on your way to enjoying a moss-free roof and a healthier, more efficient home.
For more roofing tips and materials to keep your home in great shape, explore our blog or contact us directly. We’re here to help you every step of the way.

