Roof shingles take a beating year-round, from harsh weather conditions to algae, moss, dirt, and debris buildup. Neglecting your shingles can lead to damage and shorten the lifespan of your roof, which is a costly repair no homeowner wants to face. Cleaning your roof shingles not only enhances your curb appeal but also extends the life of your roof.
This step-by-step guide will walk you through how to clean roof shingles safely and effectively, whether you’re a DIY enthusiast or a homeowner looking to save money. You’ll also learn when to call in professional help to avoid costly mistakes.
Common Problems With Dirty Roof Shingles
Before we jump into cleaning methods, it’s important to understand why dirty roof shingles can be an issue. Roofs commonly face the following problems when left uncleaned:
- Algae Growth: Black streaks on your roof? That’s most likely Gloeocapsa Magma, a type of algae that feeds on the limestone in shingles.
- Moss and Lichen: These organisms hold moisture, damaging shingles and leading to leaks.
- Dirt and Debris: Over time, dirt and organic debris build up on shingles, causing discoloration and clogging gutters.
Cleaning your shingles regularly protects your roof’s integrity and keeps these issues at bay.
The Best Ways to Clean Roof Shingles
Below, we’ll explore three popular methods to clean your roof shingles, whether you’re tackling the job from the ground or up close.
1. How to Clean Roof Shingles With Bleach
Using bleach is one of the most common and effective ways to clean roof shingles. Here’s how you can do it safely:
Materials You’ll Need:
- Water hose with a spray nozzle
- Household bleach (non-corrosive is preferable)
- Large bucket or garden sprayer
- Safety goggles, gloves, and a mask
- Ladder and non-slip shoes for safety
Method:
- Prepare the Solution: Mix 50% bleach with 50% water in a bucket or garden sprayer. For stubborn stains, you may use a 70/30 ratio.
- Protect Your Plants: Place tarps or coverings over nearby plants and landscaping to prevent the bleach mixture from causing any damage.
- Apply the Solution: Spray the bleach mixture evenly on the affected areas of your shingles. Make sure to work from the top downward to avoid streaks or damage.
- Let It Sit: Allow the bleach solution to sit for 15–20 minutes. This gives it time to break down algae, moss, and dirt.
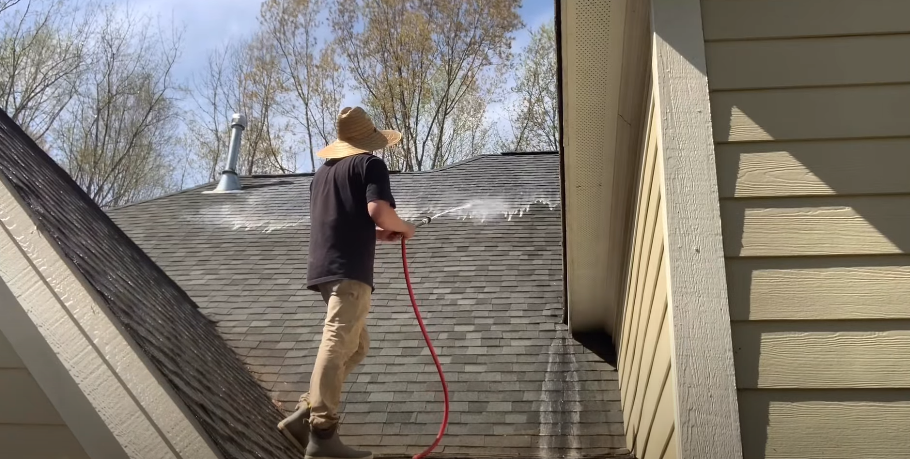
- Rinse Thoroughly: Using your water hose, rinse the shingles thoroughly to remove all cleaning solution. Avoid using pressure washers, as they can damage the granules on asphalt shingles.
Pro Tip: Always wear protective gear when working with bleach to prevent chemical irritation.
2. How to Clean Roof Shingles From the Ground
Not comfortable climbing up on the roof? You can still clean your shingles effectively by staying safely on the ground.
What You’ll Need:
- A garden sprayer or long-reach spray nozzle
- Eco-friendly roof cleaning solution (non-bleach options are best for ground cleaning)
- A garden hose
Method:
- Choose the Right Solution: Opt for a biodegradable roof cleaner that’s effective against algae and moss but safe for plants and landscaping.
- Spray the Roof: Using a long-reach spray nozzle or garden sprayer, coat your roof shingles evenly with the cleaning solution.
- Allow it to Sit: Follow the product instructions regarding wait time, which is usually between 15–30 minutes.
- Rinse From the Ground: Use a garden hose to rinse the shingles from the ground thoroughly. Ensure all the cleaning solution is removed.
Pro Tip: Cleaning from the ground is safer, but may not remove heavy moss or stubborn stains. For those, you’ll need to get closer.
3. How to Clean Roof Shingles With Vinegar
Vinegar is a great natural alternative for tackling algae and moss without the use of harsh chemicals.
Materials You’ll Need:
- White distilled vinegar
- A bucket or sprayer
- Water hose
Method:
- Prepare the Solution: Mix equal parts white vinegar and water in a bucket or sprayer.
- Apply the Solution: Spray this mixture generously onto areas with algae, moss, or dirt.
- Wait and Watch: Allow the solution to sit for at least 20 minutes. If the build-up is heavy, leave it for a longer period.
- Rinse Clean: Rinse the shingles with your water hose. You’ll see dirt and algae start to loosen and wash away.
Pro Tip: Vinegar is eco-friendly and safe on plants but might require multiple applications for tough stains.
Safety Tips to Keep in Mind
Cleaning roof shingles can be risky if safety precautions aren’t taken. Here are some important safety tips:
- Always use a sturdy extension ladder and non-slip footwear.
- Never clean the roof when it’s wet or during bad weather.
- Avoid standing or walking on shingles directly, as this can cause damage or injury.
- If you’re unsure of the stability of your roof or feel uncomfortable working at heights, hire a professional.
When to Call a Professional
While DIY roof cleaning is cost-effective and rewarding, there are times when professional help is the best option:
- Your roof has extensive moss or algae that DIY solutions can’t remove.
- There are noticeable signs of damage, such as peeling or missing shingles, or leaks.
- You don’t have the right tools or experience to complete the job safely.
Professional roof cleaning services use specialized equipment and cleaning solutions to restore your shingles without causing harm to the roof’s structure.
Adding Maintenance to Your Routine
To keep your shingles clean and maintain a healthy roof:
- Trim trees near your roof to prevent algae-friendly shade.
- Clean gutters regularly to avoid water pooling on shingles.
- Consider preventative treatments, such as applying zinc or copper strips to prevent moss and algae growth.
Final Thoughts
Keeping your roof shingles clean doesn’t have to be a daunting task. Whether you decide to clean your shingles with bleach, vinegar, or from the ground, maintaining a consistent cleaning routine will help protect your roof’s integrity and keep it looking its best.
If DIY isn’t your style or if your roof requires expert attention, consider reaching out to professionals who can expertly handle the task.
Your roof protects you—make sure to return the favor with proper care.


