Homeowners know all too well the frustration that comes with a roof leak. A tiny drip can quickly spiral into water damage, mold growth, and costly repairs. What if you could avoid all of this with a little bit of planning and the right tools? Enter roof flashing – a critical component of your roofing system designed to keep your home leak-free and structurally sound.
This guide will give you everything you need to know about roof flashing, including what it is, why it’s important, the different types available, signs that it needs repair, and the best way to handle maintenance or replacements. Whether you’re a homeowner, a DIY enthusiast, or a roofing professional, you’ll find actionable insights to protect your home and ensure your roof stands the test of time.
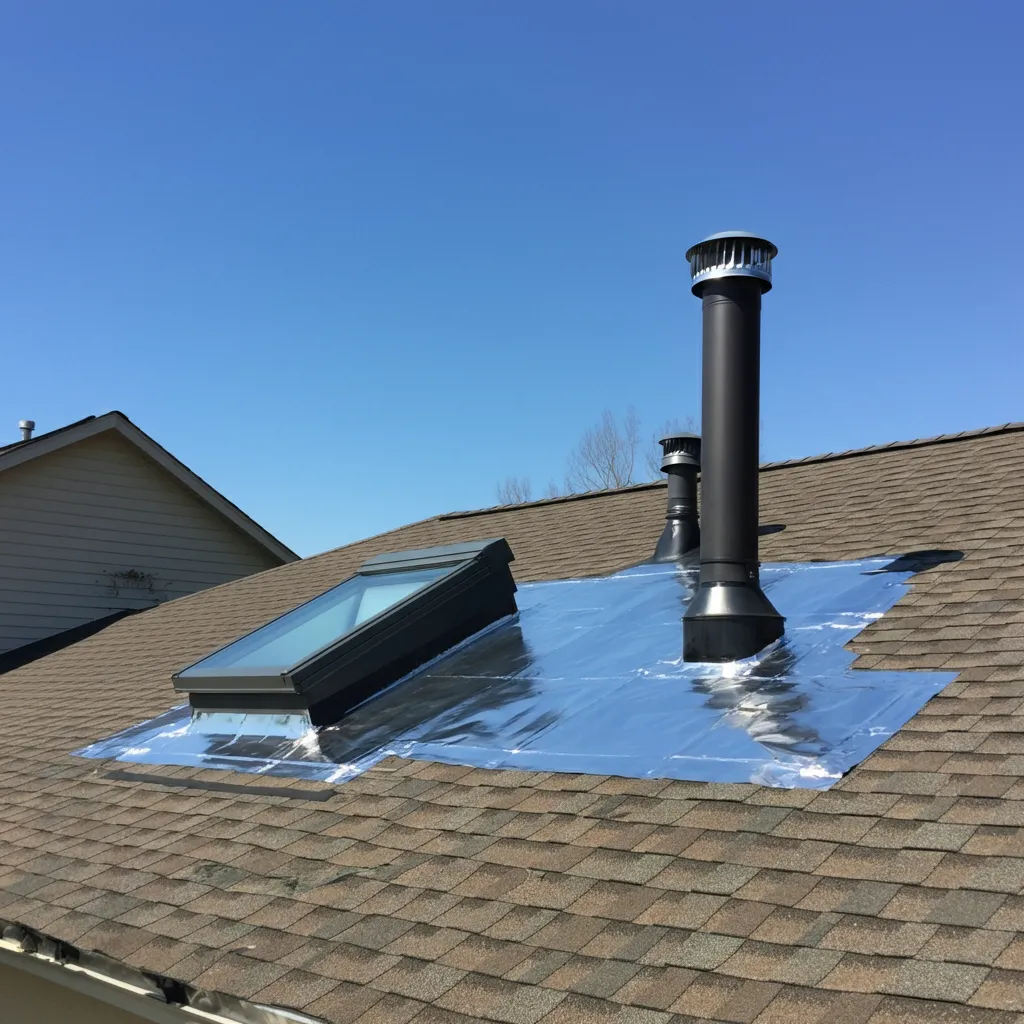
What Is Roof Flashing?
Roof flashing is typically made from thin metal materials like aluminum, galvanized steel, or copper. Its primary job? Sealing and protecting the more vulnerable areas of your roof, especially where water tends to pool or find its way inside.
Roof flashing directs water away from critical areas such as:
- Chimneys
- Vents
- Skylights
- Roof edges and valleys
By keeping these areas watertight, roof flashing helps prevent issues like water damage, structural decay, and even mold growth in your attic. Think of it as your roof’s unsung hero, quietly working behind the scenes to guard against costly repairs.
Why Is Roof Flashing Important?
When it comes to the health and longevity of your roof, flashing isn’t just important—it’s vital. Here’s why:
- Prevents Leaks: Damage or poor installation of roof flashing is one of the leading causes of roof leaks. Without proper flashing, water can seep beneath your shingles and into your home.
- Maintains Structural Integrity: Flashing shields vulnerable points, maintaining the overall stability of your roof and your home’s structure.
- Saves Money: Addressing flashing issues early can save homeowners thousands of dollars by avoiding extensive water and mold damage.
- Extends Roof Lifespan: A properly flashed and maintained roof lasts much longer, increasing the return on your investment.
Types of Roof Flashing
Different parts of a roof require different types of flashing to ensure proper protection. Here’s a breakdown of the most common types:
Continuous Flashing
This type is a single, long piece of metal designed to cover and protect long roof edges or seams. Often referred to as “apron flashing,” it channels water down to the shingles below. It’s ideal for preventing water backup in areas where runoff is heavy.
Step Flashing
If your roof meets a vertical surface like a wall or chimney, step flashing is essential. It’s installed in overlapping, stepped pieces to ensure water is directed away, preventing leaks in these tricky areas.
Vent Pipe Flashing
This flashing is designed specifically for sealing around roof penetrations like pipes and vents. A snug, watertight fit is vital for keeping water from sneaking into the gaps where pipes protrude through the roof.
Skylight Flashing
Skylights add beauty and natural light to your home, but they’re also a potential weak point for water infiltration. Specialized flashing systems, often included with skylight installations, protect these areas and keep water out.
Valley Flashing
Installed where two roof planes meet to create a valley, this type of flashing channels water effectively down to the gutter system. It’s especially important as valleys tend to collect and funnel a large amount of runoff.
Signs Your Roof Flashing Needs Repair
Roof flashing doesn’t last forever. Over time, wear and tear can compromise its performance. Here are some signs to watch for:
- Visible Damage: Rust, cracks, or separation from the roof surface.
- Missing Flashing: Sections that have come loose or been completely displaced.
- Leaks: Water stains on ceilings, mold in the attic, or damp insulation are often signs of compromised flashing.
- Warped Shingles: Shingles curling or warping near flashing often indicate water seeping underneath.
Pro Tip: Inspect your roof twice a year (spring and fall) or after heavy storms to catch these issues early.
DIY Roof Flashing Repairs vs. Hiring a Professional
When it comes to dealing with roof flashing, the decision to DIY or call a pro depends on the severity of the issue.
DIY Repairs
If the damage is minor, such as a small gap or worn sealant, you can likely handle the repair yourself. Here’s how:
- Gather tools like roofing sealant, a putty knife, and replacement flashing, if needed.
- Clean the damaged area and apply roofing sealant to cover any gaps.
- For minor flashing replacements, remove the damaged piece and replace it with a new one, securing it with roofing nails.
- Always check for proper seals around the edges.
However, be cautious. Working on a roof can be dangerous, and incorrect repairs can lead to more significant issues.
Hiring a Professional
For complex problems, like flashing replacement around chimneys, skylights, or valleys, hiring a professional is the best choice. Experts have the tools, experience, and safety equipment to ensure the job is done right.
While costs can range from $200 to $1,000 depending on the scope of work, addressing flashing problems early often prevents much more expensive repairs in the future.
How to Maintain Roof Flashing
Regular maintenance is key to extending the life of your roof flashing. Here’s a seasonal checklist to keep it in top condition:
- Clear Debris: Remove leaves and dirt that may have accumulated near flashing.
- Inspect Sealant: Check for cracks or signs of drying. Reseal if necessary.
- Avoid High-Pressure Washing: This can loosen or damage flashing over time.
- Check After Storms: Heavy rain or wind can dislodge flashing, so perform a quick visual inspection.
Costs of Roof Flashing Repair and Replacement
The expense of roof flashing repairs varies based on the type and complexity of the job. Here’s an estimate to guide you:
- Minor sealant repair or patchwork: $50–$200
- Replacing vent pipe flashing or step flashing around chimneys: $300–$600
- Complete roof flashing replacement (e.g., for skylights or valleys): $800–$1,500
Investing in quality repairs now can save thousands on costly structural damage later.
Choosing the Right Roof Flashing
When selecting materials for roof flashing, consider:
- Durability: Copper is incredibly durable but expensive; aluminum is lightweight and cost-effective.
- Climate: Galvanized steel is great for wet climates but may not last in harsh, coastal conditions.
- Compatibility: Ensure the flashing works well with your existing roof materials.
Consulting a roofing specialist is always a great idea to ensure long-term performance and protection.
Protect Your Home with Proper Roof Flashing
Roof flashing might not be the most glamorous part of your home, but it’s one of the most important. Proper installation, regular inspections, and timely repairs can save you from leaks, structural damage, and unnecessary repair costs.
Don’t wait until a small issue turns into a big problem. Inspect your roof flashing today, and if you spot any potential issues, consider hiring a professional to address them.
Need help with roof flashing repairs or inspections? Contact [Your Company Name] for expert guidance and trusted services!


