Thinking about replacing your roof vent? It’s a great way to improve your home’s air flow. This guide will show you why roof vents are important and how they keep your home healthy. You’ll learn how to do it yourself, making your home’s air better with ease.
We’ll give you step-by-step instructions and safety tips. You’ll know everything you need to replace your roof vent successfully. Let’s start!
Key Takeaways
- Roof vents are essential for maintaining proper airflow in your home.
- Identifying signs of a damaged roof vent is crucial for timely replacement.
- Essential tools and materials are necessary for a successful roof vent replacement.
- Safety precautions should always be a priority when working on your roof.
- Proper alignment and sealing can prevent future leaks and issues.
- Regular maintenance is key to maximizing the lifespan of your roof vent.
- Knowing when to call a professional can save you time and potential headaches.
Understanding the Importance of Roof Vents
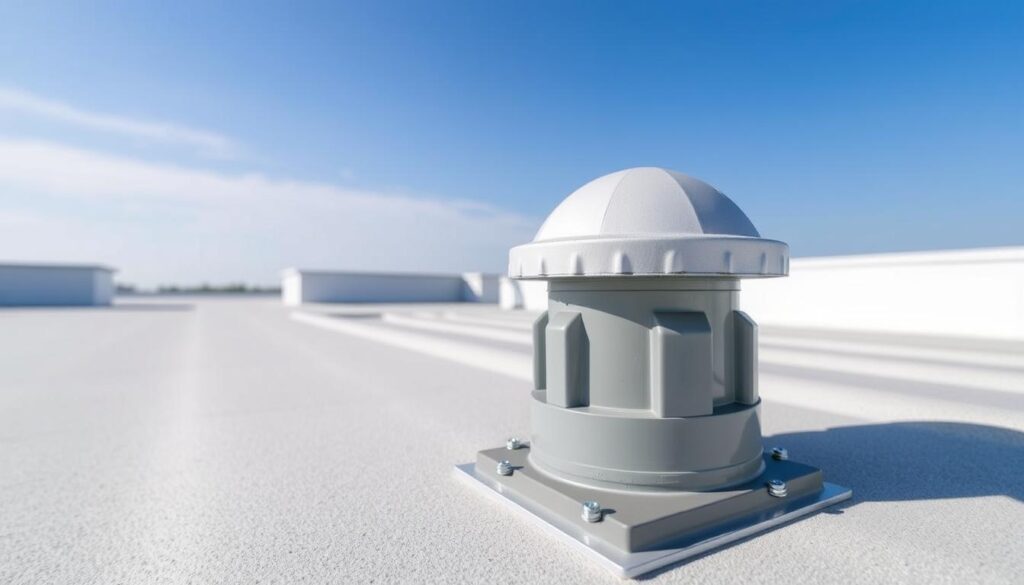
Roof vents are key to keeping your home comfy and saving energy. They help air flow right, keeping your roof in good shape. Knowing how roof vents work helps you avoid problems with too much heat and moisture.
What Do Roof Vents Do?
Roof vents let hot air and moisture out of your attic. Without them, your cooling costs might go up. Also, too much moisture can cause mold, which is bad for your health. Roof vents do a few important things:
- They help keep your home cooler, saving you money.
- They stop moisture from causing damage.
- They make sure your air inside is clean and fresh.
Signs of a Damaged Roof Vent
It’s important to know when your roof vent is damaged. Fixing it fast can save you from expensive fixes later. Look out for these signs:
- Too much heat in your attic.
- Leaks or water stains on your ceiling.
- Worn-out vent material or roof around it.
Gathering the Tools and Materials
Before you start replacing your roof vent, make sure you have the right tools for roof vent replacement and materials for roof vent installation. Being ready helps the job go smoothly and avoids surprises.
Essential Tools for Roof Vent Replacement
- Pry bar for loosening the old vent
- Utility knife for cutting roofing materials if necessary
- Screws and a drill or screwdriver for securing the new vent
- Caulk gun for applying sealant
- Ladder for safely accessing your roof
- Safety gear, including gloves and eye protection
Materials You Will Need
- A new roof vent designed for your specific roofing type
- Roofing nails to secure the vent in place
- Weatherproof sealant to prevent water infiltration
- Flashing to provide extra protection around the vent
Safety Precautions Before You Start
Before you start replacing your roof vent, safety first is key. It helps avoid accidents. Always wear safety goggles to protect your eyes from debris and dust. This simple step can prevent serious injuries.
Using a sturdy ladder is also very important. Make sure it’s in good shape, on a flat surface, and at a safe angle. Have someone hold the ladder for you while you climb. This adds extra stability.
Check the weather before you begin. Don’t replace vents on windy or rainy days. Wet surfaces are slippery, and high winds make it hard to handle tools and materials.
Working alone on a roof is risky. Having someone with you is safer. They can help if you need it or if there’s an emergency. Tell someone your plans so they can check on you.
Following these safety steps makes your roof vent replacement safer. It makes your DIY project safer and more fun. You’ll avoid many dangers.
How to Replace a Roof Vent?
Replacing a roof vent might seem hard, but it’s doable with the right steps. Following these steps makes the job easier and keeps your roof in good shape. This guide will show you how to replace a roof vent without making common mistakes.
Step-by-Step Guide to the Replacement Process
- Prepare your workspace: Make sure you have all the tools and materials ready.
- Remove the old vent: Take it off the roof carefully. Check for any damage around it.
- Install the new vent: Put it in the right spot over the opening.
- Seal the vent: Use sealant to keep water out. Make sure it’s spread evenly.
- Inspect the installation: Check for any gaps or if it’s not aligned right.
Common Mistakes to Avoid
- Improper sealing: Use enough sealant to keep water out.
- Incorrect vent alignment: If it’s not right, you might get leaks or bad airflow.
- Neglecting to check the surrounding area: Not looking for damage can cause problems later.
Preparing Your Roof for Vent Replacement
Before starting, make sure your workspace is safe and organized. Clean the area around the vent. Get rid of debris, branches, or anything that might get in your way.
Make sure you have a good place to stand. If your roof is steep, use a strong ladder and safety harness. Always check the weather first. Work when it’s calm and dry.
Organize your tools and materials well. Put everything you need, like a pry bar and roofing nails, where you can easily find them. This helps you work better without stopping.
These steps will keep you safe and make your work easier. A little preparation can lead to a big success.
Removing the Old Roof Vent
Replacing an old roof vent starts with removing it right. You need to be careful to avoid damage. This ensures a safe removal.
How to Safely Remove the Vent?
First, get your tools ready. You’ll need a screwdriver and a pry bar. Find and remove the screws that hold the vent.
After the screws are out, use a pry bar to lift the vent. Be gentle to not harm shingles or flashing. Work slowly for a safe removal.
Inspecting the Roof Surface for Damage
After removing the vent, check the roof for damage. Look for rot, leaks, or other issues. If you find problems, fix them before installing the new vent.
This step is important to keep your roof in good shape. It helps avoid future problems.
| Potential Damage Signs | Recommended Action |
|---|---|
| Blackened or discolored areas | Investigate for underlying leaks |
| Soft or spongy roof sections | Replace affected materials |
| Mold growth | Clean and treat with mold remover |
| Missing shingles | Replace missing or damaged shingles |
Following these steps makes your roofing project safer. It also prepares your roof for the new vent.
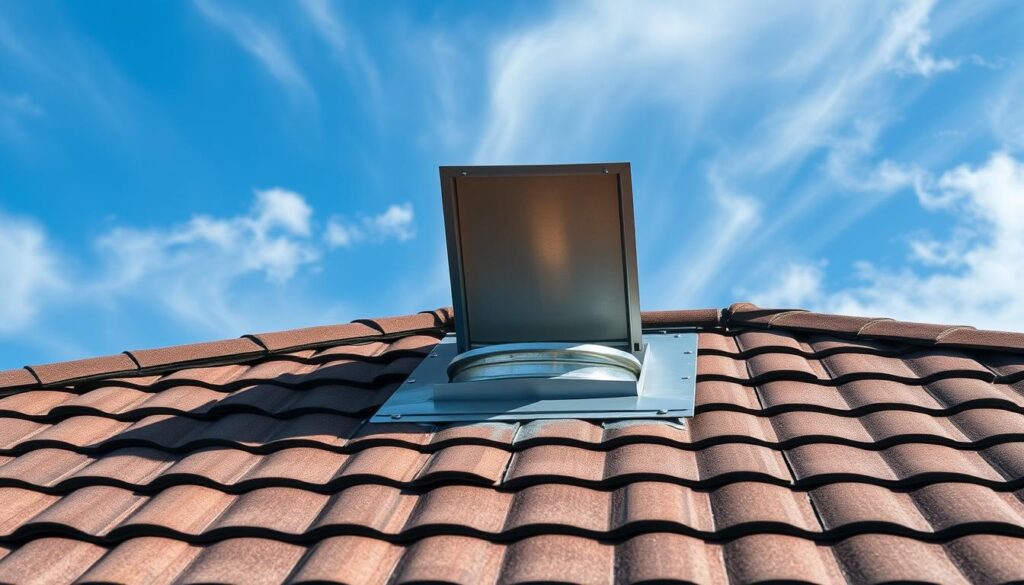
Installing the New Roof Vent
Putting in your new roof vent right is key for good air flow and no leaks. You need to line it up well with your roof’s slope and shape. Also, you must fasten it the correct way. Paying close attention to these steps can really help your roof last longer.
Aligning the New Vent Correctly
First, place the new vent where it’s supposed to go. Make sure it fits with your roof’s design. Check the slope to get the best air flow. If it’s not right, you might get water pooling or bad ventilation.
Securing the Vent Properly to Prevent Leaks
After you’ve got it in the right spot, screw it down for stability. Use special screws that won’t let water in. Then, check around the vent for any gaps. A tight roof vent keeps your roof and inside safe from leaks.
Sealing the Roof Vent
Sealing the roof vent is very important. It makes sure your roof lasts a long time. You need to pick the right sealant to stop leaks and water damage.
There are many sealants out there. Silicone and polyurethane are top choices. Knowing what they do helps you pick the best one for your roof.
Choosing the Right Sealant
Think about how flexible, weather-resistant, and easy to use the sealant is. Silicone is great because it sticks well and bends with temperature changes. Polyurethane is strong and lasts long, even in sunlight.
Looking into these options helps you find the best sealant for your roof vent.
Applying Sealant Effectively
Once you pick a sealant, apply it right. Clean and dry the area first. Put a lot of sealant around the vent, covering it all.
Use a caulking gun for better control. Then, smooth it out with a putty knife to get rid of any holes. Wait for it to dry as the maker says.
Checking Ventilation Performance
After installing your new roof vent, it’s important to check how well it works. You should look at the roof vent’s performance often. This helps make sure air flows well.
Checking if the ventilation is working right is key. It tells you if you need to make changes or add more vents.
Assessing Airflow Efficiency
To check if air flows well, you can try a few things:
- Feel for airflow: Place your hand near the vent to feel for a consistent stream of air.
- Temperature checks: Use a thermometer to measure air temperatures in different rooms, ensuring consistency.
- Energy bills: Monitor changes in energy consumption to gauge effectiveness.
Signs Your New Vent is Working Well
Your new roof vent should show it’s working right in a few ways:
- Improved indoor air quality, reducing humidity levels.
- Even temperatures throughout your home, preventing hot and cold spots.
- Reduced condensation accumulation on windows and walls.
By watching these signs, your roof vent will keep working well. This keeps your home comfortable.
Maintenance Tips for Your Roof Vent
Keeping your roof vent in good shape helps it work better and last longer. You should check it often to find problems early. It’s a good idea to inspect your roof vents every season, especially after bad weather.
It’s important to clean out debris to keep air flowing well. Leaves, dirt, and other stuff can block the vents. This can cause moisture to build up and lead to other issues. Try to remove any debris that gathers around your roof vents.
Also, make sure there’s nothing blocking the vents. Plants or branches can stop air from moving freely. Keeping these areas clear helps your roof vents work better.
Following these tips can save you money on repairs later. A little care now can make your roof vents last longer.
When to Call a Professional
Replacing a roof vent can be easy. But, some problems mean you should get help from a pro. If your roof is sagging or has water damage, get a pro. They can fix it right.
How you feel about heights matters too. If heights scare you, it’s safer to get help. Experts are trained to work safely on roofs.
Replacing many vents can be hard. If you’re doing several at once, get a pro. They make sure everything is done right, avoiding leaks.
Knowing when to get a contractor helps avoid mistakes. It’s better to ask for help early. This way, you avoid bigger problems later.
Frequently Asked Questions
Replacing a roof vent can raise many questions. We’ll answer some common ones to help you. This will make your project easier.
- How often should I replace my roof vent? You should replace it every 10 to 15 years. This depends on how much it’s used and the weather.
- Can I replace a roof vent by myself? Yes, if you have the right tools and follow safety rules. You can do it yourself.
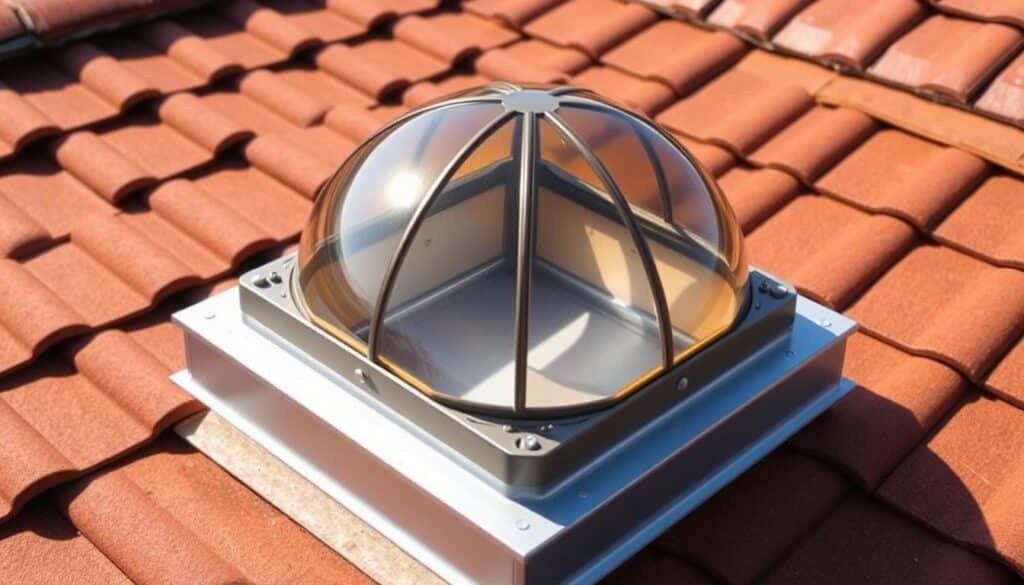
- What type of vent is best for my roof? The best vent depends on your roof and the weather where you live. You can choose from ridge vents, turbine vents, or box vents.
- How do I know if my roof vent is damaged? Look for water stains inside, cracks, or rust. These signs mean your vent might need fixing.
- What tools do I need for roof vent replacement? You’ll need a ladder, screwdriver, roofing nails, and sealant. These tools will help you secure the new vent.
This section is a quick guide for roof vent projects. If you’re unsure, it’s best to get professional help. Good luck with your roof vent replacement!
Conclusion
Replacing a roof vent is very important. It makes your home breathe better and stay healthy. You learned how to replace a roof vent in this guide.
You now know how to get the right materials and seal the new vent. This helps air move well and saves energy in your home.
It’s important to keep your roof vents in good shape. This keeps your home comfy and stops damage. A good ventilation system keeps your roof strong.
If you follow the tips in this article, you can replace roof vents easily. You’ll feel ready to do it yourself.
Being proactive is key. Watch your roof vents and fix problems fast. This makes your home healthier and more efficient.
Your hard work in learning about roof vent replacement will pay off. You’ll enjoy the benefits for many years.
FAQ
What are the benefits of replacing a roof vent?
Replacing a roof vent helps your home breathe better. It stops moisture buildup and mold. It also makes your home more energy efficient.
A good roof vent keeps your home comfy. It protects your home from damage.
How often should I inspect my roof vents?
Check your roof vents twice a year. Do it before and after bad weather. Look for damage, leaks, or blockages.
Can I replace my roof vent in the winter?
You can, but it’s harder and riskier in winter. Use safety gear and watch out for ice and snow. It’s better to do it when it’s warmer.
What sealant should I use when installing a new roof vent?
Use a strong, weatherproof sealant like silicone or polyurethane. Make sure it fits your roof and vent materials. This prevents leaks.
How do I know if my new roof vent is working properly?
Check if air moves better inside your home. Look for less humidity, even temperatures, and fewer drafts. This means your vent is working.
What tools do I need for roof vent replacement?
You’ll need a pry bar, screws, a caulk gun, and a screw gun. Don’t forget safety goggles and a sturdy ladder. Having these ready makes the job easier.
Can I replace multiple roof vents at once?
Yes, you can replace many vents at once if they’re old or damaged. Just be careful and work safely. Have someone help you.
What should I do if I find damage to the roof surface while replacing the vent?
Fix the roof damage first. Use patching material or get a pro’s help. This ensures your new vent works well.
How do I maintain my roof vent after installation?
Check the vent for damage and clean it. Make sure nothing blocks it. Do this often, especially after bad weather.
When should I call a professional for roof vent replacement?
Call a pro if you’re scared of heights or see big damage. Or if you need to replace many vents. They do it safely and right.