Your RV is more than just a vehicle—it’s your adventure buddy, your home on wheels, and your ticket to exploring the world. But how do you keep this travel companion in top form, especially when it comes to its roof? Resealing your RV roof is one job that might seem daunting, but I promise—it’s not as complicated as it sounds. It’s all about the right steps, the right tools, and a whole lotta roof-love!
This guide breaks it all down for you step-by-step. By the end, you’ll feel like a sealing superstar—and have an RV roof ready to handle rain, sun, and any element Mother Nature tosses your way.
Why Your RV Roof Deserves Some TLC
The roof of your RV is a hardworking hero. It protects you from downpours, shields you from the sun, and keeps your cozy, travel-ready world dry and comfortable. But here’s the catch—RV roofs take a beating.
Exposure to UV rays, rain, wind, and even debris can take a toll. Over time, seals and seams can crack, peel, or wear out. And before you know it, sneaky leaks can creep in, potentially causing water damage that’s as unwelcome as a raccoon in your campsite pantry.
The fix? Regular resealing. It’s a little work now that saves you from a big (pricey) headache later!
Gather Your Resealing Supplies Like a Pro
Before you climb on that roof like a DIY champ, make sure you’re armed with the right tools. Pro tip: gathering everything in advance keeps the process smooth—and your frustration to a minimum. Here’s your must-have checklist:
- RV-Specific Roof Sealant (check whether you need a silicone, EPDM, or TPO sealant based on your roof type)
- RV Roof Cleaner (gentle yet effective cleaning agents work best)
- Caulk Gun (because sealant doesn’t apply itself)
- Paint Roller or Brush (depending on your chosen sealant’s application method)
- Ladder or Roof Access Gear (safety first, always!)
- Protective Gloves (because sticky is fun, but not THAT fun)
- Soft-Bristle Brush or Sponge (for scrubbing dirt away)
- Rags or Towels (for a final wipe-down)
- Plastic Scraper/Putty Knife (to remove old sealant)
With all this on hand, you’re prepped and ready to channel your inner DIY expert!
Prep That Roof for Its Glow-Up
No half-baked efforts here—proper prep is key. Skipping this step is like frosting a cake without bothering to bake it; it just won’t hold!
- Wash and Inspect: Start by giving the roof a thorough cleaning. Use an RV-specific roof cleaner and a soft-bristle brush or sponge to scrub away dirt, grime, and any evidence of bird “blessings.” Rinse and dry thoroughly.
- Remove Old Sealant: Use a plastic scraper or putty knife to gently remove old or cracked sealant. Be careful not to damage the roof’s surface.
- Inspect for Damage: Look for any cracks, punctures, or weak spots beyond the seals. If you notice anything significant, it might be worth consulting a professional before moving forward.
A sparkling clean, damage-free roof sets the stage for a long-lasting reseal job. Trust me, future you will thank you!
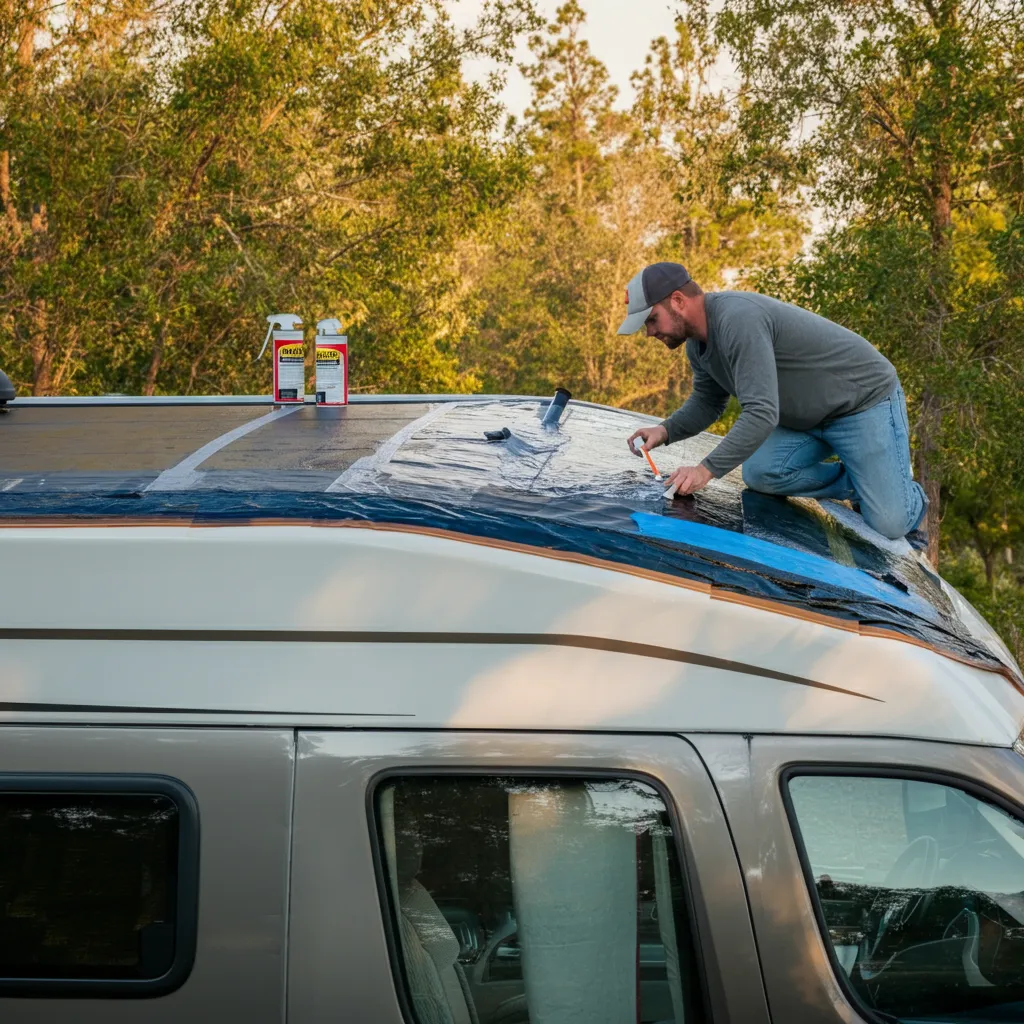
Apply Sealant Like a Boss (No Pressure!)
Now for the fun part—resealing! Follow these steps to ensure your RV roof gets the royal treatment:
- Choose the Right Sealant: Whether your RV has a rubber, fiberglass, or aluminum roof, the sealant you choose should match the material. Read that label carefully!
- Load the Caulk Gun: For seams and cracks, load your chosen sealant into a caulk gun. Apply a steady bead along seams, vents, and other areas where leaks love to lurk.
- Spread Evenly: Use a paint brush, roller, or your caulk gun’s precision nozzle to spread the sealant evenly across the surface. Don’t skimp, but don’t overdo it either—like spreading peanut butter on toast, you want it just right.
- Smooth It Out: Some sealants may require smoothing out with a putty knife for a neater finish. Check the product instructions for best results.
- Drying Time: Allow the sealant to cure according to the manufacturer’s guidelines. This step is critical. Resist climbing up to admire your handy work until it’s completely dry.
Guess what? You’ve just conquered resealing like a pro. 👏
Check for Sneaky Leaks After Sealing
Before you break open the celebratory s’mores, take a moment to inspect your work. Grab a hose (or wait for a rainy day!) and gently pour water over the roof. Keep an eye on the interior of your RV for any signs of water sneaking in.
If there’s a leak, no sweat—just touch up the area with a bit of extra sealant. You’ve got this!
Maintain Your Roof: Keep It Fresh!
Now that your roof is resealed and fabulous, how can you keep it that way? Easy steps like these will go a long way in maintaining it for the long haul:
- Inspect the roof every 3-6 months for cracks, wear, or damage.
- Wash the roof regularly to keep dirt, debris, and UV damage at bay.
- Store your RV under a cover or shelter whenever possible.
Showing your roof a little ongoing care means you’ll extend its lifespan and avoid future drama. Win-win!
When to Call the Pros (No Shame!)
Sometimes, a task is too big to tackle on your own—and that’s okay! If your RV roof has extensive damage, punctures, or mysterious leaks you can’t track, it’s worth calling in a professional. There’s no shame in getting expert help to keep your RV adventure-ready.
Roof Love Forever!
There’s something deeply satisfying about a job well done—especially when that job keeps your RV in tip-top shape for years to come. By resealing your RV roof, you’re not just protecting it; you’re investing in your adventures and ensuring your experiences stay dry, safe, and worry-free.
With the right tools, a little know-how, and some elbow grease, you’ve got what it takes to handle this DIY mission. Happy travels and even happier tinkering!
Got any RV hacks or resealing tips of your own? Drop them in the comments—we’d love to hear from you!


