When storms hit or your roof starts to leak, one of the quickest ways to protect your home is by tarping the roof. It’s not just a temporary fix—it’s a lifesaver for keeping water out and preventing further damage. But here’s the kicker—it’s easier than you might think to do it yourself!
Whether you’re a seasoned DIYer or just looking to tackle something new, this step-by-step guide will have you tarping your roof with confidence. From selecting the right tarp to properly securing it, we’ll cover everything you need to know.
Why Tarping Your Roof is a Must
Before we dive into the practical steps, let’s talk about why you should tarp your roof in the first place. Tarping is a temporary but effective solution to protect your home and belongings from water damage caused by a compromised roof. This method works in situations such as:
- Storm damage, including fallen tree limbs or hail
- Leaking shingles or damaged flashing
- Delays in professional roof repairs
Acting quickly can save you thousands of dollars in repairs, not to mention the frustration of soaked interiors. Plus, it’s a great skill for any handy homeowner to have!
What You’ll Need to Get Started
First things first, gather your materials before heading up the ladder. Here’s your checklist:
- Heavy-duty tarp: Look for a weatherproof, tear-resistant tarp large enough to cover the damaged area with some extra overlap.
- Ladder: A sturdy, extendable ladder is a must for safe access to your roof.
- Work gloves and safety gear: Includes gloves, a helmet, and non-slip shoes—safety first!
- Roofing nails or screws: Depending on your roof type, secure the tarp using nails or screws.
- 2×4 wooden planks: These will help anchor the tarp and keep it in place during windy conditions.
- Hammer or screw gun: For affixing the wooden planks and tarp.
Pro Tip: Always work during daylight hours and avoid tarping in bad weather to minimize risk.
How to Tarp a Roof in 6 Easy Steps
Here’s the breakdown of what you need to do:
Step 1: Assess the Damage
Before you begin, take a close look at the roof (from the ground, if possible) to inspect the damage. Identify the exact areas of concern, such as missing shingles or visible holes. Make sure the roof is stable enough to walk on—if it seems structurally compromised, call a professional.
Step 2: Choose the Right Tarp
Select a tarp that’s both durable and large enough to extend approximately 3-4 feet past the damaged area. A thick, blue or green polyethylene tarp with reinforced edges is ideal for most applications. Bonus points if yours is UV-resistant for added durability.
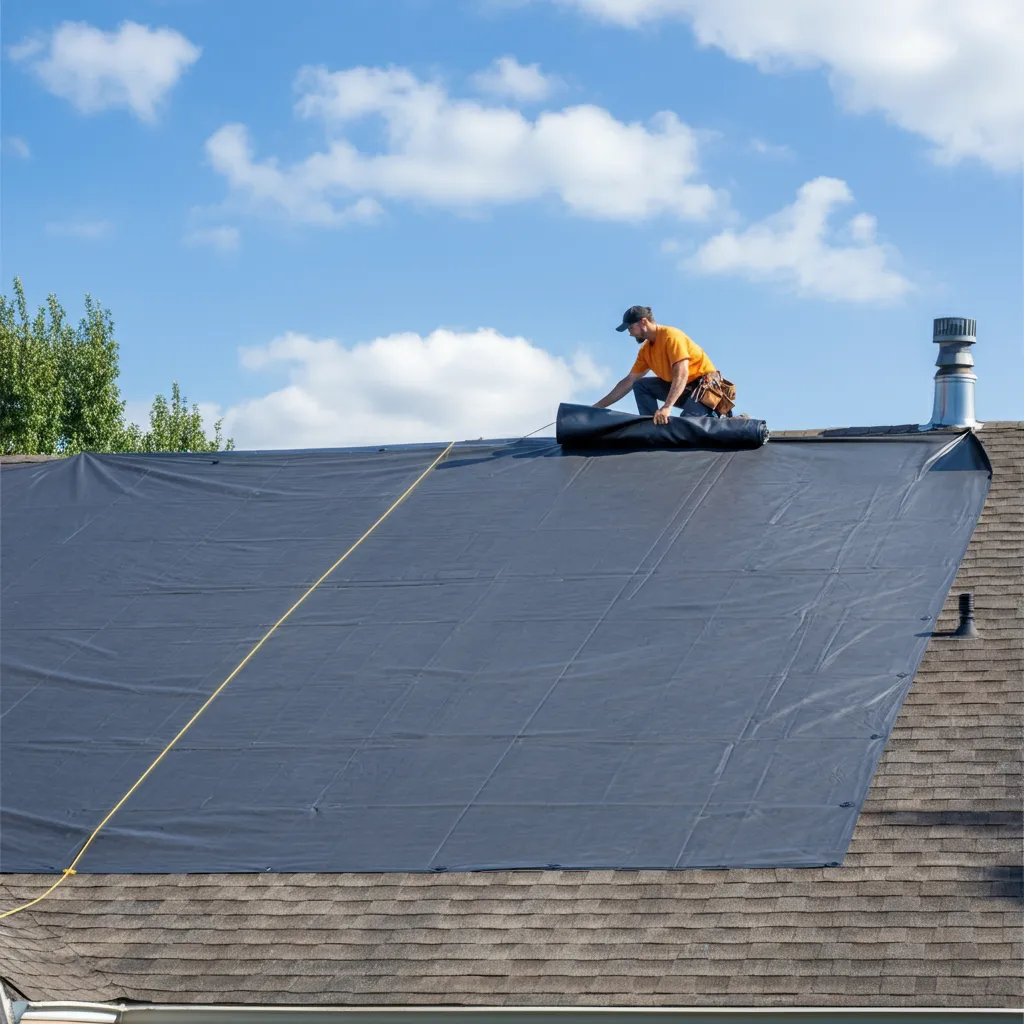
Step 3: Position the Tarp
Climb carefully onto your roof and position the tarp so that it covers the damaged area completely. Ensure there’s enough excess tarp to hang over the ridge of the roof and extend at least a few feet down the undamaged sides. This overlap will provide extra protection against water seeping through.
Pro Tip: Face the tarp with the grommeted edges pointing outward. This makes securing it easier.
Step 4: Anchor with Wooden Planks
Place 2×4 wooden planks along the edges of the tarp. Secure them by rolling the edge of the tarp around each plank like a burrito, then nail or screw them directly into the roof. This anchors the tarp, preventing it from shifting in heavy winds.
Step 5: Secure the Tarp
Use additional roofing nails or screws to fasten the remaining edges of the tarp (through the grommets works best). Start at one end of the tarp and work your way to the other, keeping the material taut. This helps prevent pooling water, which can tear the tarp or cause leaks.
Pro Tip: Don’t over-tighten the tarp—it needs a little give to handle wind and rain effectively.
Step 6: Double-Check Your Work
Once everything is secured, step back and inspect your setup. Smooth out wrinkles to ensure water will flow off the surface properly. Tug lightly on the tarp edges to confirm everything is firmly anchored.
Dos and Don’ts for Tarping a Roof
Here are a few quick tips to keep your project on track:
DOs
- Wear appropriate safety gear, including a harness if necessary.
- Work with a helper—extra hands make the job significantly easier.
- Use bright-colored tarps to keep them visible, especially during stormy weather.
DON’Ts
- Don’t tarp under dangerous weather conditions—wait for clear skies.
- Avoid overloading the roof with tools or materials to prevent unnecessary strain.
- Don’t leave gaps when securing the tarp—water will find its way through.
How Long Can a Roof Tarp Last?
A properly secured tarp can last anywhere from a few weeks to a couple of months, depending on the weather and material quality. However, it’s important to treat this as a temporary solution. Plan to schedule repairs with a professional roofer as soon as possible.
Protect Your Home with Confidence
Tarping a roof might seem daunting, but with this guide, you’re more than equipped to take on the challenge. Not only will you protect your home from damage, but you’ll also gain a valuable skill that can save you time, money, and frustration.
Got a tricky patch to cover or need more tips? Share your tarping stories and questions in the comments below—we’d love to help! If you’re tackling other DIY home projects, stick around for more practical guides like this one.


